Friday, December 30

Hair Cream Recipe


Here's a quick and easy recipe for a soft silky hair lotion

Soft & Silky Hair Cream
1-1 1/2 cup Aloe Vera Gel or Juice
3 Tbsp Olive Oil
3 Tbsp Shea butter (can also use cocoa, illipe or kokoum butter instead)
1/2 Tbsp Coconut Oil (optional-can use avocado, sesame or whatever you desire)
2 Tbsp Castor Oil (provides shine)
1 Tbsp Honey (provides shine and moisture)
2 tsp Vitamin E Oil
2 tsp Jojoba Oil
2 Tbsp Emulsifying Wax, vegetable based
2 tsp Steraic Acid (this is a natural vegetable based wax)
5 drops Lavender Essential Oil
5 drops Sweet Orange Oil
5 drops Rosemary Essential Oil

Water Phase:
In a medium bowl combine aloe vera gel (or juice) and honey.

Oil Phase:
In a double boiler heat up olive, coconut, castor oils and add emulsifying wax and steraic acid over a medium heat. Stirl until wax and acid have completely dissolved. Remove from heat, add shea butter and stir until partially or completely melted. Let cool for about 10 minutes.

Combine water phase and oil phase. Then add in vitamin E, jojoba and essential oils. With a hand mixer or stick blender thoroughly mix for 15 minutes. Let mixture rest in fridge or freezer for about10 minutes then blend again for another 15 minutes, make sure to scrape down sides of the bowl. You'll notice that because there's more water in this mixture than oils that it's going to have a pudding like consistency. Pour into desired container and store in a dry, cool place.

Thursday, December 29

Remedying Dry Hair


Dry hair happens when oil and moisture escapes your hair and it becomes dry and lacks sheen and softness.  It feels rough, looks dull, appears frizzy and breaks off easily.  The longer hair stays dry the more prone it is to become brittle and dull.  Some people will experience dry hair that comes and goes due to various outside influences such as excessive washing, weather (sun and wind) stress, diet, health (illness or disorder), etc. Also try to avoid shampooing with shampoos laden sulfates, rinsing with hot water, and using heated appliances (flat irons and hair dryers).

Healthy hair has a moisture content of 10%. So if your hair's moisture content falls below that then the ability for your hair to retain moisture decreases, which causes the hair to lose elasticity and suppleness.

There are many different cost effective and natural ways that you can remedy your dry hair.

Vitamins - Take a look at the vitamins you're taking or not taking. Biotin has been known to help strengthen hair. Fruits (orange colored) and vegetable (dark leafy greens) that contain vitamin A not only taste good but help to keep the hair from drying out.

Moisturizing - Drinking lots of water provides moisture to your hair. Spritz your hair and/or apply an oil to moisturize the hair strands helping to keep them healthy.

Deep Conditioning - This process helps to bring much needed moisture to the hair and allows the conditioning treatment to penetrate the cuticle and shaft of the hair.

Avocado Hair Mask
1/2 avocado (or 1 over ripe banana)
3 1/2 oz coconut milk (half a can; can also use yogurt if desired)
2 oz coconut oil
1 Tbsp castor oil
1 Tbsp olive oil
1 tsp honey

Combine avocado and coconut milk in a food processor and puree until smooth (you don't want any chunks or lumps). Add in remainder of ingredients. Section hair and apply mixture from root to tip and cover with a plastic cap (or bag) then cover with a towel and let sit for 30 minutes to an hour. Rinse out with cool or lukewarm water.

Hot Oil Treatment - It's been proven many times that hot oil treatments are an effective way to adding moisture back to dry and damaged hair. They are most effective when applied to the hair anywhere from 3 to 6 weeks (this depends on how dry or damaged your hair may be). Click here for an easy recipe.

Protein Treatment - These treatments work to build the hair shaft back up so that it can retain much needed mositure. Click here for some basic and inexpensive recipes.

Wednesday, December 28

Dry Scalp? Causes & Treatments


Causes
Lack of moisture, harsh weather conditions or hair products laden with chemicals can cause a dry, itchy, and flaky scalp. An itchy, dry and/or flaky scalp usually means that it needs to breathe. Years of using products with chemicals can cause an allergic reaction.  In some cases a dry and flaking scalp can be due to other conditions such as dandruff, eczema or psoriasis. Dandruff is caused when skin cells flake off, which are most commonly oily and not dry. Eczema is when a heavy amount of dandruff is accompained with an intense itchy scalp. Psoriasis causes the scalp to flake with silvery flakes and become red and irriated.

Here are some simple changes you can make to your haircare routine.

Scalp cleansing. Using apple cider vinegar helps to detoxify your scalp, open up the pores and bring the ingredients to cure the scalp condition. Many market products that are made for itchy scalp have too many chemicals, many of which cause the problem in the first place. Cleanse your scalp once a week or as often as needed.

Shampooing. Frequent shampooing can strip the scalp of moisture from its natural oils especially in the winter when there is a lack of moisture in the air. Follow up by moisturizing the scalp and hair with a good hair butter or your favorite oil. Using too much shampoo makes it diffuclt to rinse it all out and if any is left behind it dries and flakes.

Hot oil treatments. Apply a warm oil (i.e. olive) to the scalp and gently rubbing it in with the pads of your fingers. Cover with a plastic cap and wrap with a towel and let sit for 30 mintues to an hour. Wash out with a gentle or sulfate free shampoo and lukewarm or cool water.

Gently massage your scalp. This increases blood flow to the scalp, which helps to clear any blocked pores. Massaging your scalp also helps to loosen any dead skin cells, making them eaiser to wash away. Try not to scratch as scratching can leave cuts on the skin which may lead to infection.

Use less heat. Too much heat (blow dryers and flat/curling irons) can irritate and dry out the scalp, making it even flakier. Washing your hair with hot water can also add to the problem. Instead it's best to use lukewarm or cool water and let your hair air dry instead of using a blow dryer. If you must use a blow dryer than put it on the cool setting.

Cover your head when the sun is out. In the summer it's best to wear a hat to prevent your scalp getting sunburned, which adds to dryness.

Treatments
In addition to being a great astringent for the skin, apple cider vinegar (ACV) has been used for years to cleanse the hair and scalp of product buildup and environmental residue. It helps to control dandruff and prevent the scalp from becoming scaly or itchy.  When ACV is infused with aloe vera and herbs it can condition, soften the hair without stripping it and restore pH balance.  ACV clarifies and restores natural scalp balance while aloe vera restores your hair's natural pH balance.

ACV Cleanser
2 tablespoons Apple Cider Vinegar
1 cup Aloe Vera Juice
5 drops Lemon Essential Oil
5 drops Sweet Orange Essential Oil

Combine all ingredients in a bottle with an applicator tip. Apply cleanser to scalp and gently massage in with fingers. Wash out with a gentle or sulfate free shampoo with cool or lukewarm water.

Note: The base of aloe vera, lemon and sweet orange oil helps to nourish the hair shaft, leaving the hair soft.

Herbal ACV Cleanser
1/3 cup Apple Cider Vinegar
1 1/2 cup Aloe Vera Gel
1 teaspoon Nettle
1 teaspoon Calendula
1 teaspoon Rosemary
1 teaspoon Burdock Root
1 teaspoon Chamomile
1 teaspoon Horsetail
1 teaspoon Sage
1 teaspoon Oregano
1 teaspoon Licorice Root
1 teaspoon Willow Bark
5 to 10 drops Lemon Essential Oil
5 drops Lavender Essential Oil
5 drops Rosemary Essential Oil (optional)

Combine apple cider vinegar and herbs in a glass bowl and place over a pot of boiling water over medium heat (creating a double boiler) and let infuse anywhere from 15 to 30 minutes. Be sure to stir the mixture occasionally. After 15 minutes or so remove from heat, strain herbs through cheesecloth and mesh strainer and let stand until infusion is lukewarm. Add in aloe vera gel and essential oils. Use a whisk to break down clumps of aloe vera gel. Pour and store in a glass container, preferably an amber or colored glass bottle.

You can also combine the herbs, apple cider vinegar, aloe vera gel and essential oils in a large glass jar and let sit in a cool, dry place anywhere from a week to four weeks. Be sure to gently roll the jar one to two times a week.

When ready to use dilute 1-2 tablespoons of infused ACV to 1 cup of distilled water. Note: Dry or fresh herbs will give you the same results. You can use any essential oils you like.

Final note: You will want to use apple cider vinegar opposed to white vinegar because ACV is made from fermented apples while white vinegar is derived oxidized alcohol.  Be patient as these treatments can take up to six weeks before you start to see the results you want.

Sunday, November 27

Natural Hair Q&A


The following questions are from a decadent beauty who's transitioning from relaxed to natural. At the moment she wishes not to have her picture posted.

Q: I just did a partial big chop. Is it normal that my hair is always shedding?
A: Shedding is normal especially after a "big chop". Because you're a newly natural it may seem a bit excessive because of the adjustment your hair is going through. Just know that our hair sheds on a daily basis unless of course it's in a protective style and there are those of us that shed more hair than others and that's normal. Now if you notice that there are some bald spots where you have shed some hair than that's a different matter all together like alopecia. I recommend seeing a doctor if that's the case.

Q: Ok, because it was a lot of hair. I didn't know if it was because I wear a lot of headbands or if it was thining.
A: Try not to wear headbands as much because the hair is trying to regenerate so the band is pulling and stressing the hair follicles. Thus why I suggest not using a brush. If you want to smooth down the edges of your hairline then spritz it with water, apply castor oil or gel and place a silk/satin scarf on it for about 10 minutes.

Q: Ok, I'll try that. Thanks. I have a long way to go with this natural hair thing. I just hope it begins to grow.
A: It will. Just remember to be patient, that's the key. On average our hair grows half an inch a month, which gives a total of 6 inches a year. Figure out a regular hair care routine and moisturize daily. You'll be fine.

Q: Is there a reason why my hair has two different textures? The front is straight with a slight curl to it and the rest is curly. Did the perm maybe change the texture?
A: It is normal to have more than one texture in your hair. And it is possible for the chemical of a relaxer or texturizer to change the texture of your hair. Watch that area as it grows out and if the ends are still straight while the new growth is curly then the ends of the hair is still relaxed and needs to be trimmed/cut off.

Q: How long does it take for a relaxer to grow out?
A: It depends on how fast your hair grows. Remember on average we get a total of 6" of new growth a year. There are those of us where our hair grows faster. You might want to trim off the relaxed ends every 6 to 8 weeks depending on how much growth you've acquired.

Q: Do you recommend micro (braids)?
A: Micro braids are fine as long as your edges or any thin/weak parts of your hair aren't braided to tightly. You don't want the hair pulled so tight that when you take them out your hair comes out with it.

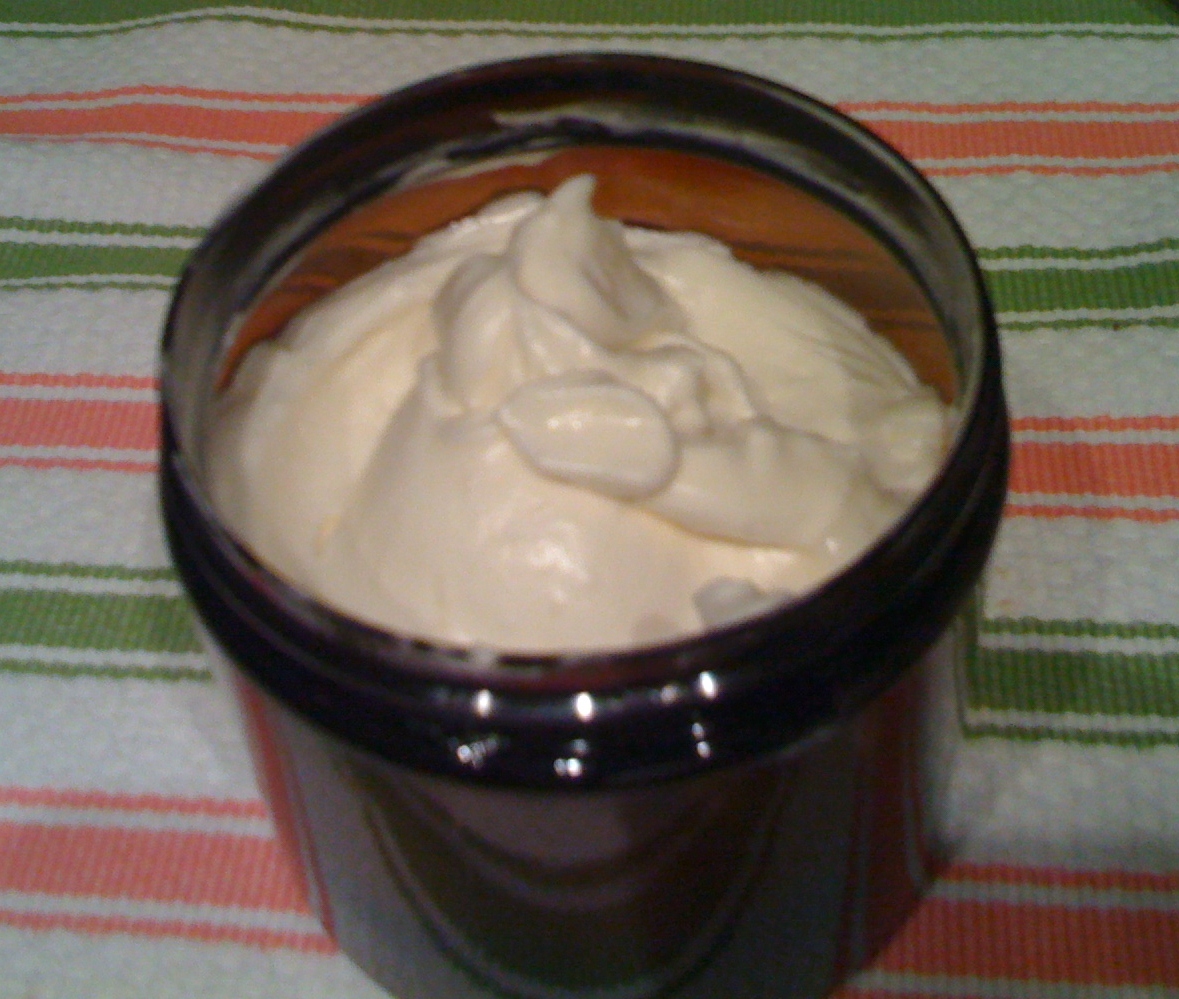
Q: Can I use the mayo conditioner every week?
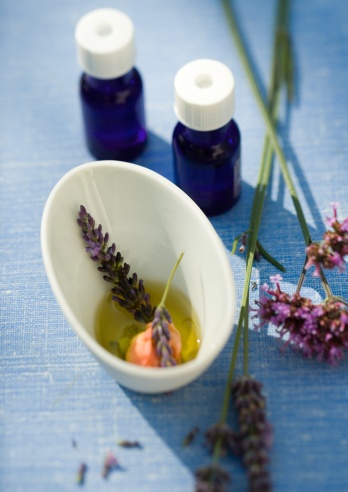
A: You can I would also recommend adding 5 to 10 drops each of rosemary and lavender essential oils because they're known to help promote hair growth.

Q: Are texturizers ok to use?
A: No. Although they're advertised to bring out the natural curl pattern of one's hair it's still a chemical. There are lots of natural products such as flaxseed gel, castor oil or shealoe that can enhance your natural curl pattern.

Q: I don't like how my hair looks and feels after doing the "big chop". I want it to look and feel softer. It was badly damaged, broken off and had varying lengths when it was relaxed. That's why I was considering a texturizer. What do you recommend?
A: Alternate between co-washing and shampooing, moisturize daily (whether it's with water, oil or a combination of the two), deep condition once a week and do a protein treatment once every 6 to 8 weeks. After about three months or so (if not sooner) you should notice the difference in how your hair feels.

Q: What if I decide to put my hair in a protective style for three months? Will that cause my hair any damage?
A: No. With your hair in a protective style it won't be prone to the daily manipulation of styling. Just be mindful to clean your scalp like with a ACV or rosemary/tea tree oil spritz and moisturize your hair and scalp as often as needed. Take care to shampoo or co-wash it as needed and seal in the moisture with a good hair butter. Wear a stain scarf or bonnet or sleep on a satin pillow case. Just a side note to that, if you're going to keep your hair braided for the better part of a year be sure to give your hair a 1 to 2 week breathing period. You don't want to risk thining edges or breakage/damage.

Q: Do you have a recommendation for a homemade hair spritz ?
A: 1/2 c distilled water, 1/3 c oil (coconut, almond, olive or any oil of your choice), 1/3 c vegetable glycerin or aloe vera juice and 5 to 10 drops of the essential voice of your choice (rosemary, lavender, etc.).

Q: Do I have to moisturize my hair with a water based spritz?
A: No. You can also use an oil (coconut, olive, etc.) or butter (cocoa or shea) of your choice to moisturize your hair and scalp.

Q: Is Argan oil an essential oil?
A: Actually Argan oil is a carrier oil. Essential oils are a concentrated oil derived from a plant or herb and have a strong natural fragrance to them.

Monday, August 29

Repurposing Containers

Recently on Facebook someone posed the question do you recycle your containers when you finish using the products?  I commented that I did and I decided to take it one step further by posting some pictures on how I repurpose my containers. I confess that my material of choice when it comes to containers is glass. I know that some plastics are recycleable and BPA free but I'm willing to pay the extra few cents for glass. I use a mixture of both food or non-food contianers but one doesn't really pay much attention to it once they they've been repurposed it for another use.

Here's just some examples of how I've repurposed my containers.


So, do you recycle and if so how do you recycle/repurpose your containers?

Decadent Beauty - Whoissugar


I'm honored to be featuring one of my favorite YouTubers. Check her out.

How long have you been natural and what led you to go natural?
I wanted to go natural for some time but didn’t have the nerve to cut off all my (LONG) hair. Also, I didn’t have the patience to transition and battle with two different hair textures.That was 6.5 years ago, 2 December 2004 was when I re-established my nappiness.  I was inspired to go natural after professing how “I know who am.”, but I didn’t know a basic characteristic…what texture my natural hair was.


What do you think is the best thing about being natural?
The best thing about being natural is having a uniquehead of hair. NO ONE will ever have the same hair as you. *flips natural hair*


What is your hair care regimen?
My hair care regimen is simple. Drink lots of water. Detangle. Condition. Shampoo when dirty (real or imagined), which is about once per week. Condition (again) after I shampoo it. I use coconut oil and jojoba oil for moisture. I made avideo about it. Like to see it? Here ya go:


How do you maintain moisture?
I drink LOTS of water. I water my hair (shampoo) weekly. While wet, I seal in moisture with coconut and jojoba oils.


Any words of wisdom that you'd like to share with transitioners or newly naturals?
Hang in there. Be patient. You may have many different textures on your head. Shrinkage is real; 12 inches of naturalhair can look like 3 inches of natural hair. Heat (flat irons, blow-dryers, curling irons) is the devil. Be careful,you can ruin your natural hair texture with too much heat. Don’t try to getyour hair to something that it is not meant to do.  Don’t chase the curl pattern or that “good hair”. Love your hair as is. There will be some days where your hair iscompletely busted…and that is ok. Don’t give up. Also, I didn’t transition. O_O I could not deal with the 2 different textures. I will say, the demarcation linebetween your relaxed hair and natural hair is fragile. Be gentle with it. Well, what do you know? I made a video about this topic too:


Is there anything else that you'd like to add?
Watch out for random people touching your hair! Oh, welcome. Bless.


Follow whoissugar here:

YouTube
Twitter
Facebook

Monday, August 8

Au Naturale "Waxing"

Sugaring is an ancient hair removal technique that hails from the Middle East.  This sugar based paste is just as effective as waxing but is much more friendlier to the body.  The natural ingredients for this recipe are simple and can be found in your kitchen.
 
Sugar Paste

2 cups Sugar (white, brown or demerara - DO NOT use powdered sugar)
1/4 cup Lemon juice
1/4 cup Water, distilled
1 tsp Vitamin E oil
1 tsp Jojoba oil
5 drops Tea Tree oil (optional)

In a medium sauce pan combine sugar, lemon juice and water. Over a medium high heat cook the ingredients for 5 to 8 minutes, constantly stirring so that it doesn't burn until it reaches 240 degrees fahrenheit. Once the mixture has reached the desired temperature turn down the heat to medium low and bring to a simmer. Remember to continue stirring the mixture. Once your paste has reached a thick viscosity remove from heat and add your oils, mixing thoroughly. Pour into desired container and store in a dry, cool place.


When applying this paste it doesn't need to be very warm, it can be applied when lukewarm.  It can be applied to the upper lip, arms, legs, brow, back, chest and bikini area. When peeling off this paste you can do so in the direction of the hair growth whereas with waxing it's peeled off against the hair growth, which can cause ingrown hairs.  Sugaring has been known to help elminate this common problem.  Also when the sugar paste is removed it takes the accumulated dead cells with it leaving your skin in tact with a natrual healthy glow.
 

Friday, June 24

Sunday, June 5

Henna Deep Conditioning Hair Treatment

Henna powder

Henna helps improves the scalp by removing accumulated product and impurities. Henna also conditions while coating the hair cuticle providing strength, shine while preventing hair loss and breakage.

5 Tbsp Henna powder
3 Tbsp Alma (Gooseberry) powder
1 c Yogurt or Mayonnaise (moisturizing fat-do not use low fat; can also be substituted with favorite conditioner)
1 Egg white (protein-optional)
1 Tbsp coffee powder or coffee water (optional)
Lemon juice from half a lemon
1-2 Tbsp coconut or olive oil (this prevents your hair from drying out)

Mix all ingredients and let it sit covered, overnight in a warm place. Letting it sit overnight is optional; by letting the mixture sit overnight it allows the natural color to be released. Depending on the volume and length of your hair you want to section your hair into four (or more). Apply the henna to your hair from root to tip (make sure you’re wearing plastic gloves and an old t-shirt as henna stains).

After applying the henna to youre entire head cover your hair with a plastic cap or bag (wrap a towel on top of that if you want extra heat) and let it sit for an hour. Wash out with cool or lukewarm water never hot water as it closes up the hair cuticle and doesn’t allow the nutrients to penetrate the hair shaft. There’s no need to use shampoo or conditioner while you wash this out because this treatment conditions and cleanses the hair and scalp. Detangle and style as normal.

NOTE: Egg is a protein so if you’re going to do this treatment then do so once every eight weeks or if your hair is protein sensitive then omit the egg. Otherwise you can do this treatment once a week or how ever often you deep condition your hair. Within three months you should notice how much healthier and stronger you hair has become.

Saturday, June 4

Homemade Vatika Hair Oil


Vatika hair oil is mixture of pure coconut or olive oil with ayurvedic herbs (such as henna, amla, and shikakai, etc.)  that nourishes and conditions the hair while providing body and shine.

Phase I
1 cup Coconut or Olive Oil
1/2 cup Almond Oil (this can be substituted for a non nut oil if you're allergic, i.e. sesame oil)
1 Tablespoon Henna
1 Tablespoon Amla Powder
1 Tablespoon Shikakai Powder
1 teaspoon dried or fresh Rosemary (optional)
1 teaspoon dried or fresh Lavender (optional)
1 teaspoon dried or fresh Thyme (optional)

PhaseII
1 teaspoon Cactus Extact
1 teaspoon or 10 drops Lemon Extract
3 Tablespoons Castor Oil

1 Tablespoon Vitamin E
5 to 10 drops Lemon Essential Oil

In a double boiler combine coconut or olive oil, almond oil, henna, amla, shikakai, rosemary, lavender and thyme and let infuse over a low medium heat for 20 to 30 minutes.  Be sure to occassionally stir so that the herbs or oils don't burn.  Remove from heat and strain oil through a cheesecloth and strainer.  Let cool for 30 minutes.

Once mixture has cooled add in cactus extract, lemon extract, castor oil, vitamin E and lemon essential oil.  Mix the oils by stiring slowly or rolling* in a bottle.  Pour into desired container. You now have your very own homemade vatika hair oil.

Notes: Any of the above mentioned ayurvedic powders can be substitued for others of your choosing.  It's important to remember that when mixing oils to never shake them because this can cause free radicals, which will lead to the oil going rancid.  It's always best to gently roll the oils in the container.  Almond oil coats, conditions and softens your hair.  Cactus extract gives your hair health and volume.  Lemon oil regulates sebum flow and helps keep dandruff away.

Tuesday, May 17

Basic Hair Butter


Here's an easy recipe for a basic hair butter.

1/ 2 to 1 cup Shea Butter
1/3 cup Olive Oil
1/4 cup Coconut Oil (optional if you have a nut allergy)
1/4 cup Castor Oil
2 Tablespoon Vegetable Glycerin or Honey
1 Tablspoon Vitamin E Oil
5-10 drops Rosemary or Lavender Essential Oil (optional)

In a double boiler heat up olive, coconut and castor oils over a medium-low heat for 15 to 20 minutes. Remove from heat and add in shea butter. Stir oils until shea butter is completely melted. If there's still a small amount of shea butter left don't worry, it'll get incorporated as you blend the mixture later.

Using a hand held mixer (or stick blender) to thoroughly blend your mixture for 10 minutes. Add in vitamin E oil and mix for a few more minutes. Place mixture in the freezer for 30 minutes. Remove from freezer and blend mixture for another 10 minutes. Remember to scrape down the sides of your bowl as your mix. Place mixture back in freezer for another 15 to 20 minutes.

Remove from freezer and whip mixture one last time before adding in your essential oil(s). Transfer mixture into desired container (remember, you can resue an old product container if desired). Makes about 8 to 10 ounces of product.

Thursday, April 28

Castor Shealoe

Here's a quick Castor Shealoe recipe that's great for twist outs, braid outs, bantu knots, locs or loose hair.


This is what not to do when mixing your ingredients. Adding the aloe vera gel right in with the shea butter.


Remember that since aloe vera gel is a water based product your oils and gel will not mix together without the aid of heat or an emulsifying wax, which is a binding agent. It's best to melt your oils (with the exception of the vitamin E) and emulsifying wax down first. Mix together and let cool for about 5-10 minutes before adding in the aloe vera gel.

Castor Shealoe

3 Tbsp Jamaican Black Castor oil or regular castor oil
4 oz Shea Butter
4 Tbsp Aloe Vera Gel
2 tsp Emulsifying wax (vegetable based) optional
2 tsp Vitamin E oil
10 drops Tea Tree oil (optional)
10 drops Lavender essential oil or Rosemary essential oil


Melt your butter and wax in a double boiler (glass bowl over on top of a pot of boiling water) or in the microwave in 30 second spurts for about a minute or so until the wax is completely melted.  Remove from heat and let cool for 5-10 minutes. Using a sick blender or hand mixer thoroughly mix in castor oil and aloe vera gel. Then add in vitamin E and essential oils. Transfer to a container with a lid. Mixture will thicken up and solidfy as it cools down.

Note: You can get creative and infuse your castor oil with herbs that aid in hair growth/stimulation (i.e. sage, rosemary or lavender). You can also substitute the shea butter for many other butters that are great for hair.

Ayurvedic Hair Tea


Ayurvedic Hair Tea

1 1/4 c Distilled Water
2 tsp Shikakai powder
2 tsp Amla powder
2 tsp Brahmi powder
2 Soap Nuts
2 tsp Vegetable Glycerine
2 tsp Vitamin E Oil
5 drops Rosemary Essential Oil (optional)
5 drops Lavender Essential Oil (optional)
5 drops Lemongrass Essential Oil (optional)
2 tsp Rosemary Oil Extract or Grapefruit Seed Extract (preservative)

In a medium to sauce pot mix the ayuverdic herbs in with the water. Bring to a boil over a medium heat and then let simmer for 15 minutes.  Strain through a strainer and cheesecloth and let cool for 10 to 15 minutes.  Thoroughly stir in remainder of ingredients. Pour into a spray bottle.
Related Posts Plugin for WordPress, Blogger...